Are you blasting the same email to everyone in your email list, or sending specific messages to only the customers it applies to?
The more targeted you can make your emails, the more effective you’ll find them to be. If you’re using foreUP marketing, you can create targeted marketing messages by utilizing the Groups feature in your Customers module.
Listen in while Kris McIntire, foreUP Customer Success Manager, walks us through how to create and use groups for better email marketing.
Creating Groups for Marketing your Golf Course
Let’s say you have a seniors’ tournament happening in a few weeks. You want to tell your customers about it, but you don’t necessarily want to tell everyone. Rather, you just want to announce the tournament to Seniors who live locally.
By utilizing the Groups feature within the Customers module, you can do just this. You simply find the customers with the Advanced Search features, and then add those customers to a new group.
Step One: Create the Group
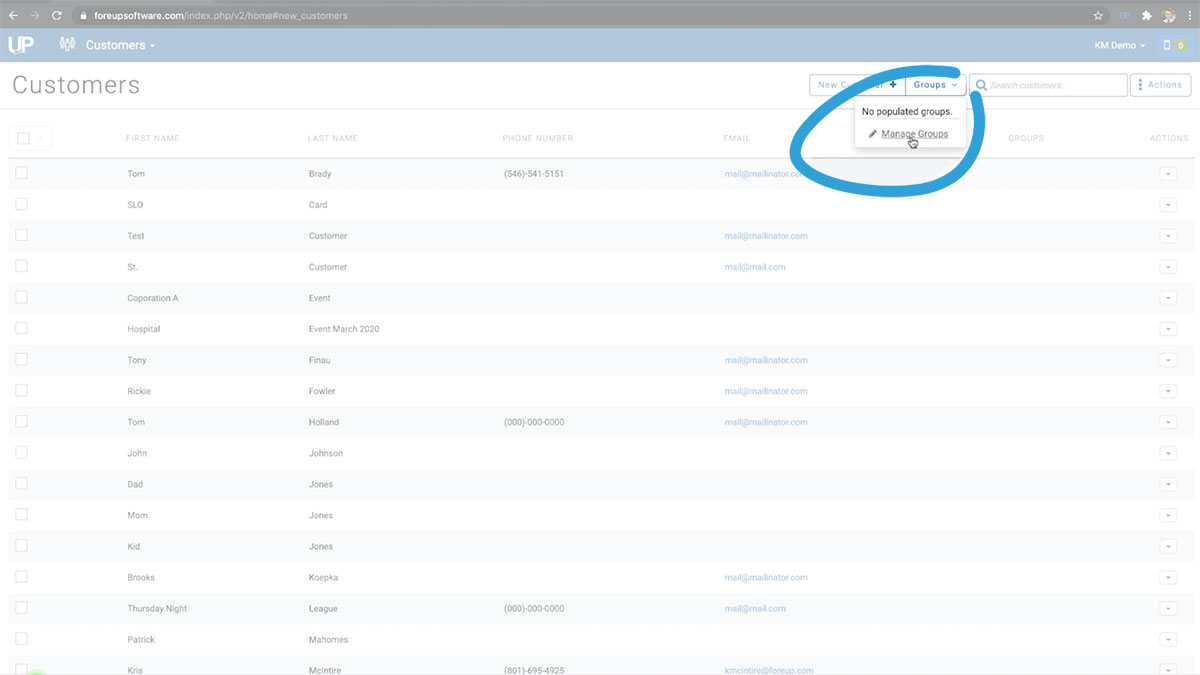
Navigate to the Customers module and select Manage Groups from the Groups dropdown menu. From here, add the name of the group you will be creating. For this, the group may be called Local Seniors. Once created, save your changes.
Step Two: Use Advanced Search Features to Find Contacts
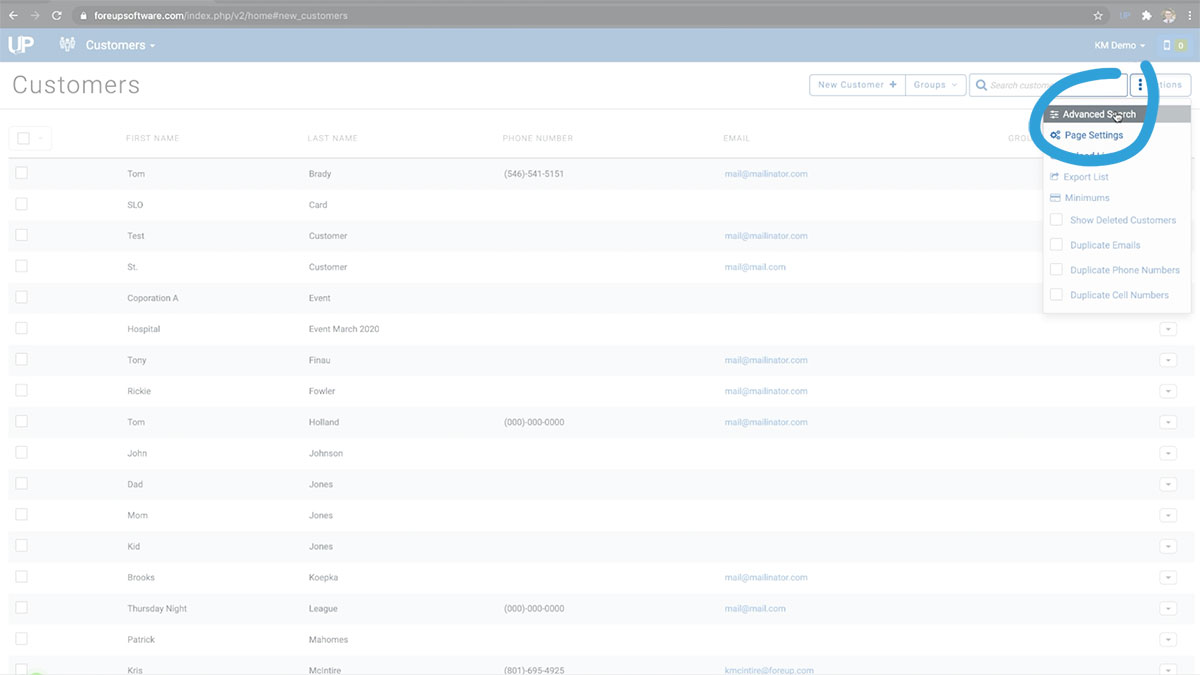
Click the Actions button on the top right of the Customers screen, and then click Advanced Search. From here, you can determine which criteria you want to search by. For this example, we’re going to add a criteria of birth year (let’s say 1960).
Then, we can layer more criteria on top of that. The second in this example, would be local zip codes.
Once you click the plus button, just enter the zip code you want to filter with. After the criteria is all added, the software works its magic and pulls up a list of contacts who meet all of these settings.
Step Three: Add Customers to Group
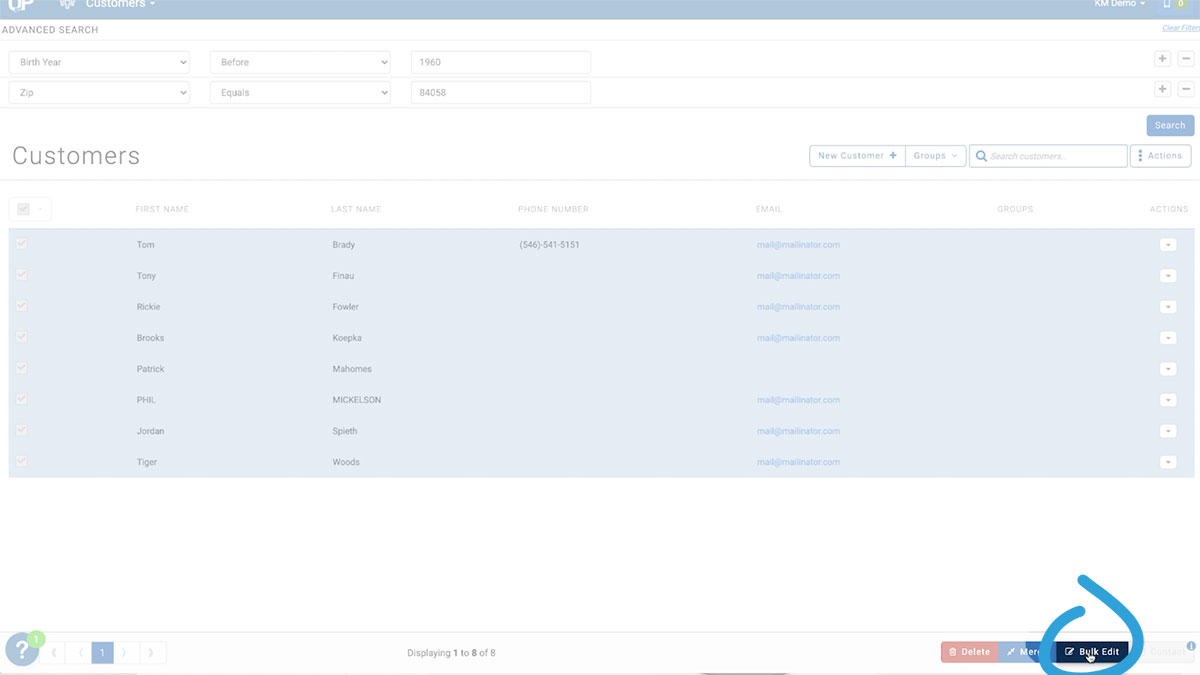
Now that the software has populated a list of customers for you, click the checkbox at the top of the list of your customers and select all customers in the list. Click the Bulk Edit button in the bottom right, and under the Information section, select Customer Groups.
Now you can select Add to existing group, and then select the group you just created. (Local Seniors) Click Confirm, and let the software work its magic to add them to the group.
In the example given by Kris, we only used one zip code. However, you can layer on as many filters as you’d like when you create your initial list of Customers.
Step Four: Add Group to Marketing Campaign
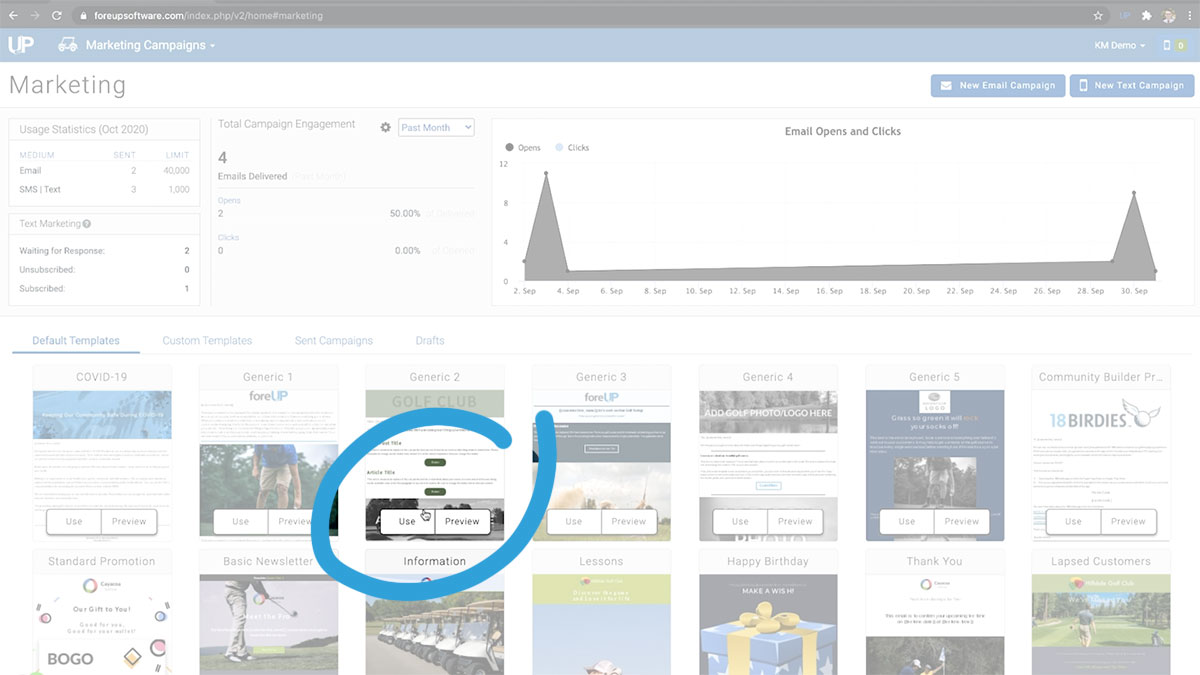
Navigate to the Marketing module, in the top left navigation. Either create a new template or choose from a custom template. Edit the email to fit your needs (reference our video on creating and saving templates here), and then click Recipients.
Here, select the Group dropdown and choose the Local Seniors group we just created. Once the group has been added, you’ll be able to send your Local Seniors Tournament announcement to just your local seniors.
You’ve Personalized Your Marketing!
You have now sent a marketing message to the people in your database who are most likely to take the correct action. Of equal importance, you haven’t cluttered the inbox of the other contacts in your system for whom the message does not apply.
We encourage you to create as many groups as necessary to begin sending targeted, timely messages that will encourage action.
Take a look at all the marketing tools that are available in the foreUP system. If you’d like more complex targeting options, communicate with your Account Manager to discuss your options.
Don’t have time for all this? Contact your Account Manager to learn about foreUP Marketing Services; a team of experienced golf marketers who work closely with courses to set up and deploy effective marketing campaigns that have proven to drive revenue.
